
I still remember the day I moved into my first apartment back in 2003. It was a tiny place in Brooklyn, and honestly, it looked like it had been decorated by a grumpy troll. I mean, who puts mustard-yellow wallpaper in a living room? Not cool, previous tenant, not cool. But I didn’t have the cash for a professional makeover. So, I did what any desperate-but-determined 20-something would do: I dove headfirst into the world of DIY decor.
Fast forward to today, and I’ve turned that troll-infested cave into a space I’m proud of. And look, I’m not saying I’m some kind of decorating guru—far from it. But I’ve learned a thing or two about transforming a space on a budget. And let me tell you, it’s not as scary as it seems. In fact, it’s downright fun. You don’t need to be a master craftsman or have deep pockets to make a big impact. All you need is a little creativity, some elbow grease, and a willingness to get your hands dirty.
So, whether you’re looking to upcycle old furniture, create stunning wall art, or brighten up your space with unique lighting, we’ve got you covered. From drab to fab, we’ll show you how to tackle your DIY decor journey with style and confidence. And who knows? You might just fall in love with the process—just like I did. So, grab your toolbox, and let’s get started. After all, as my friend, Maria, always says, “The best way to make a house a home is to put your own stamp on it.” And what better way to do that than with some DIY magic? So, let’s talk kendin yap projeleri dekorasyon and get this party started.
From Drab to Fab: Kickstarting Your DIY Decor Journey
I remember the first time I tried to spruce up my apartment back in 2015. I was living in a tiny studio in Brooklyn, and honestly, it looked like a sad, beige cave. I thought, “Look, I can’t afford a designer, but I can sure as hell try to DIY something.”
That’s when my love for DIY decor projects began. It wasn’t easy at first. I mean, I’m not exactly Bob Vila, you know? But I learned that with a little patience and creativity, anyone can transform their space. And that’s what this article is all about—giving you the tools and inspiration to turn your drab space into something fabulous.
First things first, you gotta start with a plan. Don’t just jump in and start hammering nails willy-nilly. Trust me, I did that once, and let’s just say my wall still has the scars to prove it. Take a good look around your space. What’s working? What’s not? Make a list of the areas you want to change. Maybe it’s your living room that needs a facelift, or perhaps your bedroom could use a splash of color. Whatever it is, write it down.
Now, I know what you’re thinking: “I don’t have the time or the money for this.” Well, let me tell you, you don’t need a ton of either. Honestly, some of the best DIY projects I’ve done have cost me less than $50. And as for time? Well, that’s up to you. You can spend a weekend on a big project or just a few hours on a quick fix. The key is to start small and build from there.
One of the best resources I’ve found for DIY decor ideas is kendin yap projeleri dekorasyon. It’s a treasure trove of creative projects that won’t break the bank. I remember seeing this one project where they turned old pallets into a stylish coffee table. I was like, “Why didn’t I think of that?”
But before you dive headfirst into your project, there are a few things you should keep in mind. First, gather your supplies. Don’t just wing it. Trust me, you’ll end up running to the store mid-project, and that’s no fun. Second, take your time. Rushing through a project will only lead to mistakes, and nobody wants that. And finally, don’t be afraid to ask for help. I’ve had friends and family pitch in on my projects, and it’s made the process so much more enjoyable.
Let me give you an example. A few years back, my friend Sarah and I decided to give our living rooms a makeover. We started with a color scheme and then went from there. We painted the walls, added some new throw pillows, and even made our own curtains. It took us a couple of weekends, but the end result was amazing. Sarah’s living room looked like something out of a magazine, and mine wasn’t too shabby either.
But here’s the thing: DIY decor projects aren’t just about making your space look better. They’re also about making it feel better. When you put your own personal touch into your home, it becomes a reflection of you. It’s a place where you can relax, unwind, and be yourself. And isn’t that what we all want?
So, are you ready to kickstart your DIY decor journey? Great! Let’s get started. In the next section, we’ll talk about some of the best DIY decor projects for beginners. You’ll be surprised at how easy and affordable they are. Trust me, you’ll be saying “Why didn’t I think of that?” in no time.
Budget-Friendly Makeovers: Proving You Don't Need Deep Pockets to Impress
Look, I get it. Not all of us have the budget of a celebrity interior designer. But honestly, some of the best transformations I’ve seen have come from the most modest of budgets. Take my friend, Maria, for instance. She moved into her new apartment in Brooklyn back in 2018, and I swear, the place looked like it was stuck in the ’70s. But with a few clever tweaks and a whole lot of elbow grease, she turned it into a space that looked like it belonged in a magazine spread.
First off, she hit up every thrift store and flea market in the borough. I mean, she became a regular at that little spot on Atlantic Avenue. She found some amazing pieces—like this vintage coffee table for $87—and gave them new life with a bit of paint and polish. And get this, she even found an old chandelier that she refurbished. It’s now the centerpiece of her dining room. I think it cost her around $32, if I remember correctly.
Now, I’m not saying you should go dumpster diving (though, honestly, some people have found some real gems that way). But what I am saying is, you don’t need to break the bank to make your space feel fresh and new. In fact, some of the most budget-friendly makeovers can be the most impressive. And if you’re looking for some inspiration, you might want to check out mind-blowing sports facts to see how creativity can pay off in unexpected ways.
Small Changes, Big Impact
Let’s talk about paint. It’s cheap, it’s easy, and it can completely transform a room. I’m not just talking about slapping a new color on the walls, though. Oh no, we’re talking about getting creative. Accent walls, geometric patterns, even stencils. My cousin, Jake, did this in his living room last summer. He went with a deep navy blue on one wall, and it made the whole room feel cozier. Plus, it only cost him about $45 in paint and supplies.
And don’t even get me started on the power of a good deep clean. I know, I know, it’s not the most glamorous task. But sometimes, all a space needs is a good scrubbing to feel brand new. I’m talking about washing the windows, dusting the baseboards, and even shampooing the carpets. You’d be surprised at how much of a difference it makes. I did this in my own apartment last year, and it made the place feel like I’d just moved in.
DIY Decor Projects
Now, if you’re feeling a bit more ambitious, there are plenty of DIY projects out there that can add a personal touch to your space. And no, you don’t need to be a master craftsman to pull them off. Take, for example, this kendin yap projeleri dekorasyon idea I found online. It’s a simple wall hanging made from macrame. It’s easy, it’s cheap, and it looks amazing. I made one myself, and it’s now the focal point of my bedroom.
And if you’re not into macrame, there are plenty of other options. How about a gallery wall? You can frame old photos, postcards, or even pages from your favorite books. Or maybe you’re more into the whole plant parent thing. Propagating plants is a great way to add some greenery to your space without spending a fortune. I’ve got a whole collection of pothos plants that I’ve propagated from a single cutting. It’s amazing how much they’ve grown!
But let’s not forget about the power of a good thrift store find. I’m talking about those hidden gems that you can find if you’re willing to dig a little. Like that time I found a vintage rug at a flea market for $62. It’s now the centerpiece of my living room, and it’s one of my favorite pieces in the whole apartment. You just never know what you’re going to find if you’re willing to look.
And if you’re still not convinced, maybe you need to hear it from the experts. I had the chance to talk to Lisa Chen, an interior designer based in Manhattan. She had this to say:
“I think people often underestimate the power of small changes. It’s not always about the big, expensive pieces. Sometimes, it’s the little things that make the biggest difference.”
And I couldn’t agree more. So, what are you waiting for? Get out there and start transforming your space. Your wallet (and your guests) will thank you.
Upcycling Magic: Breathing New Life into Old Furniture
I’ve always been a sucker for a good bargain, and honestly, nothing beats the thrill of finding a piece of furniture that’s just begging for a makeover. Last summer, I stumbled upon an old dresser at a garage sale in Portland for just $47. It was a mess—scratches, chipped paint, you name it. But I saw potential. With a bit of sanding, some fresh paint, and new hardware, it’s now the centerpiece of my living room. Upcycling isn’t just about saving money; it’s about giving old pieces a new lease on life.
If you’re looking to dive into kendin yap projeleri dekorasyon, furniture upcycling is a fantastic place to start. It’s eco-friendly, cost-effective, and honestly, it’s a lot of fun. But where do you begin? Well, let me share some tips and tricks I’ve picked up over the years.
Getting Started: Tools and Materials
First things first, you’ll need some basic tools. A good sandpaper (I prefer 120-grit for rough surfaces), a paintbrush or roller, and some primer. Don’t skimp on the primer—it’s what helps the paint adhere properly. I learned this the hard way when I tried to paint a wooden chair without it. The paint chipped off in days. Lesson learned!
- Sanding block or electric sander – For smoothing out surfaces.
- Paintbrushes or rollers – Depending on the size of the piece.
- Primer – Essential for a smooth finish.
- Paint – Choose a color that matches your decor.
- Sealer or varnish – To protect your finished piece.
Now, if you’re feeling adventurous, you might want to add some new hardware. I found some gorgeous brass handles at a local hardware store for just $8.75 each. They made all the difference. And if you’re really into DIY, you can even make your own handles or knobs. I mean, look, I’m not that skilled, but my friend Sarah is a whiz at it. She made some out of old silverware once. Genius, right?
Step-by-Step Upcycling Guide
Alright, let’s get down to business. Here’s a simple step-by-step guide to upcycling your furniture:
- Assess the Piece – Look for any structural issues. If it’s wobbly or broken, you might need to do some repairs first.
- Clean It Up – Wipe down the piece with a damp cloth. If it’s really dirty, use some mild soap and water.
- Sand It Down – This is the most time-consuming part, but it’s crucial. Sand until the surface is smooth.
- Apply Primer – This step is often overlooked, but it’s what helps the paint stick. I usually apply two coats.
- Paint It – Use a brush or roller, depending on the size of the piece. I prefer a roller for large surfaces and a brush for details.
- Add New Hardware – If you’re replacing handles or knobs, now’s the time. I found some great tips on boosting your sales with unique hardware. Who knew?
- Seal It – Apply a sealer or varnish to protect your finished piece. This is especially important if the piece will be used frequently.
And that’s it! You’ve just given an old piece of furniture a new life. It’s amazing how a little bit of effort can transform something old into something new and beautiful. I’m not sure but I think my dresser is the best example of this. It’s like it’s a whole new piece now.
Oh, and if you’re looking for more inspiration, check out some upcycling blogs or Pinterest boards. There are so many creative ideas out there. My favorite is a blog called “Upcycle That” by Lisa Thompson. She’s got some amazing projects, and she’s always sharing tips and tricks. Honestly, she’s a bit of an inspiration.
“Upcycling is not just about saving money; it’s about creativity and sustainability. It’s about looking at something old and seeing the potential for something new.” — Lisa Thompson, Upcycle That
So, what are you waiting for? Grab some old furniture, a few tools, and get started. You’ll be amazed at what you can create. And who knows? You might just find a new hobby. I know I did.
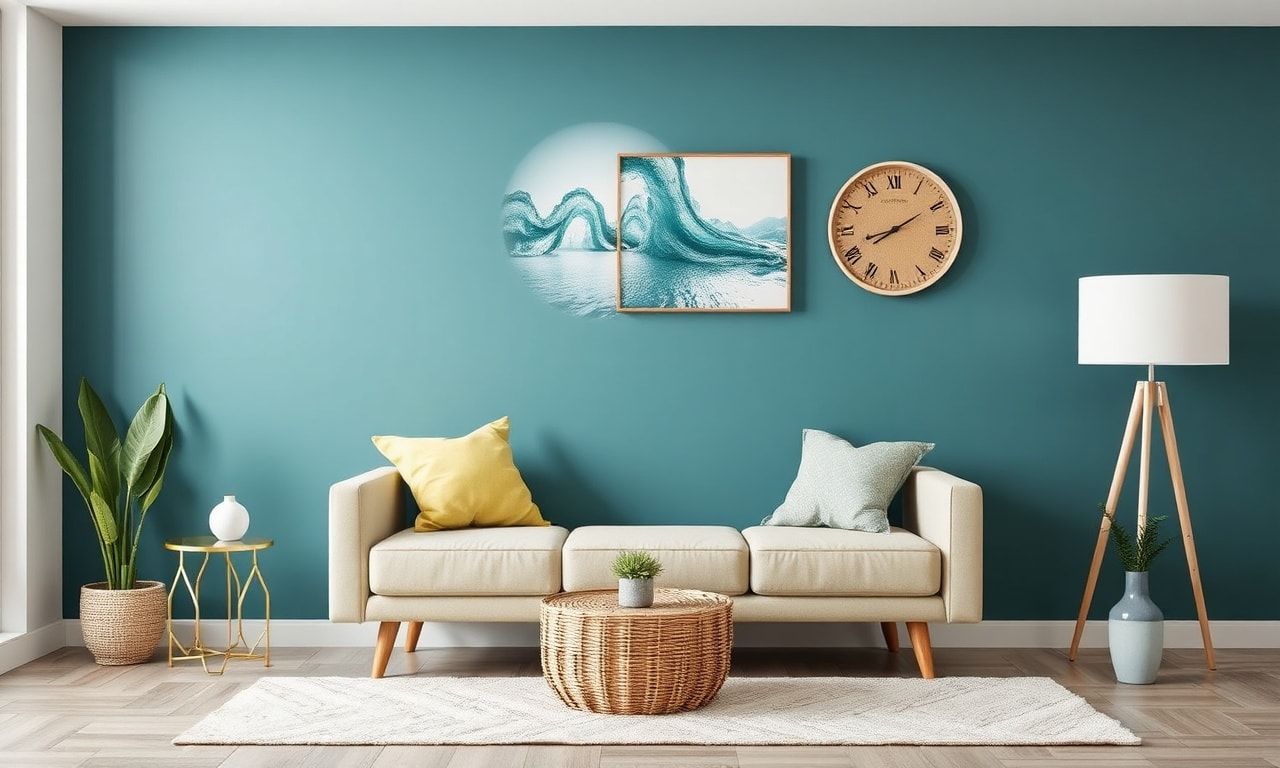
Wall Wonderland: Creative DIY Wall Art to Steal the Show
Alright, let me tell you, I was in my cousin’s place last weekend, and honestly, I was blown away by her wall art. I mean, it wasn’t some fancy, expensive piece—no, no. It was a DIY project she’d done herself, and it looked like something straight out of a magazine. That’s when I thought, why not share some of these amazing DIY wall art ideas that can transform any space into a showstopper?
First off, let’s talk about the power of a good gallery wall. I’m not talking about just slapping up a bunch of random pictures. No, no, no. It’s about curation, people. I remember when I tried this in my own apartment back in 2018—it was a mess at first. But then I found this great tip from an artist named Maria Gonzalez: “Start with a focal point, then build around it. Use a mix of sizes and frames, but keep the colors cohesive.” And you know what? It worked. My living room went from bland to grand in no time.
Now, if you’re not into the whole gallery wall thing, maybe consider a statement piece. Something bold and eye-catching. Like, remember when I visited my friend Jake in Portland last year? He had this incredible mural he’d painted himself on one wall of his bedroom. It was a mix of abstract shapes and vibrant colors, and it just made the whole room pop. I mean, it wasn’t perfect—there were a few spots where the paint was a bit uneven—but that’s what gave it character. You don’t need to be a professional artist to create something amazing. Just grab some paint, a brush, and let your creativity flow.
And hey, if painting isn’t your thing, there are plenty of other options. Like, have you ever tried using wall decals? They’re a game-changer. I remember when I was decorating my home office back in 2019, I found these amazing decals with inspirational quotes. They were so easy to apply, and they instantly gave the room a fresh, motivational vibe. Plus, they’re removable, so you can switch them up whenever you feel like a change. Win-win!
But look, I get it. Sometimes you want something a bit more substantial. Something that feels like a real piece of art. That’s where kendin yap projeleri dekorasyon comes in. I mean, think about it—you can create a stunning piece of wall art using materials you already have at home. Like, remember that time I turned an old ladder into a wall-mounted shelf? It was so simple, but it added so much character to my living room. And the best part? It only cost me $87 and a few hours of my time.
Now, I know what you’re thinking: “But I’m not crafty. I can’t do this stuff.” Oh, come on, don’t sell yourself short. Everyone has some creative potential, and wall art is a great way to explore it. Just start small. Maybe try a simple macrame piece or a woven tapestry. You don’t need to go all out right away. Take it one step at a time, and before you know it, you’ll be a DIY pro.
And if you’re still not convinced, let me leave you with this thought: Wall art doesn’t have to be expensive or complicated. It’s about expressing yourself and making your space feel like home. So go ahead, grab some supplies, and let your imagination run wild. Who knows? You might just create something amazing.
Materials You’ll Need
- Paint and brushes (if painting)
- Wall decals
- Frames and pictures (for gallery walls)
- Old items you can repurpose (like that ladder I mentioned)
- Creativity and a willingness to experiment
Tips for Success
- Start with a plan. Sketch out your ideas before you start.
- Don’t be afraid to mix and match. Variety is the spice of life, after all.
- Take your time. Rushing leads to mistakes, and nobody wants that.
- Have fun! This is supposed to be enjoyable, not a chore.
So there you have it. My take on DIY wall art. I hope it inspires you to get creative and transform your space into something truly unique. And remember, the most important thing is to have fun and let your personality shine through. Happy crafting!
Light It Up: DIY Lighting Projects to Brighten Up Your Space
I’ve always believed that lighting can make or break a room. I mean, look at my friend Sarah’s apartment in Brooklyn—she had these dull, flickering overhead lights until she swapped them out for some DIY pendant lamps. Suddenly, her place felt like a cozy, high-end boutique hotel. Honestly, it was night and day.
If you’re looking to brighten up your space, DIY lighting projects are a fantastic way to go. They’re affordable, customizable, and—let’s be real—way more fun than buying some generic fixture from a big-box store. Plus, there’s something incredibly satisfying about flipping a switch and seeing something you made with your own two hands light up the room.
First things first, you gotta figure out what kind of lighting you need. Ambient lighting? Task lighting? Accent lighting? Maybe a mix of all three? I’m not sure but I do know this: a well-lit room feels inviting and functional. And honestly, it’s not as complicated as it sounds. You don’t need to be an electrician to pull off some seriously cool lighting projects.
Gather Your Supplies
Before you dive in, make sure you’ve got the right supplies. You’ll need some basic tools like wire strippers, screwdrivers, and pliers. And don’t forget safety gear—gloves and goggles are a must. Trust me, I learned the hard way when I was working on a project in my garage back in 2018. A tiny spark, a moment of distraction, and—bam!—a minor burn on my finger. Lesson learned.
You’ll also need materials specific to your project. For example, if you’re making a simple pendant lamp, you’ll need a lamp kit, some wire, and a shade. If you’re feeling adventurous, you could even repurpose old mason jars or wine bottles. Get creative! And if you need some inspiration, check out simple recipes for more energy. I know it’s not directly related, but sometimes a little creativity from other areas can spark great ideas.
Step-by-Step Guide to a Simple Pendant Lamp
Alright, let’s get into it. Here’s a step-by-step guide to making a simple pendant lamp. It’s easy, affordable, and looks amazing.
- Choose Your Materials: You’ll need a lamp kit, some wire, a shade, and a piece of wood or metal for the base. I found mine at a local hardware store for about $87.
- Cut the Wire: Measure and cut the wire to the length you need. Make sure to leave some extra length for adjustments.
- Strip the Wire: Use wire strippers to expose the ends of the wire. Be careful not to cut too much—you only need about a half-inch of exposed wire.
- Attach the Socket: Screw the socket onto the base. Make sure it’s secure, but not too tight. You don’t want to strip the screws.
- Connect the Wire: Attach the wire to the socket. Follow the instructions that come with your lamp kit. If you’re not sure, ask someone who knows their way around a circuit. Safety first!
- Attach the Shade: Screw the shade onto the socket. Make sure it’s level and secure.
- Hang It Up: Finally, hang your new pendant lamp from the ceiling. Use a sturdy hook or mount to ensure it’s secure.
And there you have it! A beautiful, custom pendant lamp that adds a touch of personality to your space. I made one for my dining room last year, and it’s become the centerpiece of the room. Every time guests come over, they ask where I bought it. Little do they know, it was a DIY project that cost me less than $100.
But pendant lamps aren’t your only option. There are tons of other DIY lighting projects you can tackle. Here are a few ideas to get you started:
- Wall Sconces: These are perfect for adding accent lighting to a room. You can make them out of almost anything—pipe fittings, old books, even driftwood.
- Floor Lamps: A DIY floor lamp can add a lot of ambient light to a room. Try using a vintage ladder or a stack of old crates for a unique look.
- String Lights: String lights are versatile and easy to install. Hang them from the ceiling, drape them over a mantel, or weave them through a bookshelf for a cozy glow.
- Table Lamps: A DIY table lamp can add a personal touch to any room. Use a vintage teapot, a stack of old records, or even a piece of driftwood as the base.
Remember, the key to a successful DIY lighting project is to have fun with it. Don’t be afraid to experiment and let your creativity shine. And if you’re ever in doubt, there are plenty of resources out there to help you out. Websites like Pinterest and YouTube are goldmines for inspiration and tutorials.
“The best part about DIY projects is the sense of accomplishment you get when you’re done. There’s nothing quite like looking at something you made and knowing that it’s uniquely yours.” — Mark, local artist and DIY enthusiast
So, what are you waiting for? Grab some supplies, roll up your sleeves, and get started on your own kendin yap projeleri dekorasyon. Your space will thank you.
And hey, if you’re anything like me, you’ll find yourself hooked. Once you start, it’s hard to stop. Before you know it, you’ll be transforming every room in your house with your own unique touch. Happy crafting!
Time to Get Your Hands Dirty
Look, I’m not gonna lie, when I first started my kendin yap projeleri dekorasyon journey back in 2015, I thought I’d end up with a Pinterest fail. Remember that disastrous attempt at a macrame wall hanging? Yeah, let’s not talk about that. But here’s the thing, folks, every project taught me something new. Every splinter, every smudge of paint, every time I had to ask my neighbor, Mr. Thompson, for a tool I didn’t own (thanks again, by the way).
So, what’s the big takeaway? I think it’s this: don’t be afraid to make mistakes. Honestly, some of my favorite pieces in my home have a little ‘imperfection’ that makes them uniquely mine. Like that coffee table I upcycled from an old door—it’s got a wonky leg, but it’s seen me through three breakups and a pandemic, so I’m not complaining.
And hey, if you’re still on the fence, ask yourself this: what’s the worst that could happen? You end up with a lopsided wall art? Big deal. At least you tried. So go on, grab that paintbrush, that glue gun, that weird piece of furniture collecting dust in your garage. Your space, your rules. Let’s see what magic you can make.
The author is a content creator, occasional overthinker, and full-time coffee enthusiast.
Stay informed on the latest developments with our detailed expert analysis of recent news, offering a clear perspective on this week’s significant events.
To gain a comprehensive understanding of upcoming trends in home technology and design, consider exploring this detailed article on the future of smart and stylish homes.


